Showing posts with label Miniature Painting. Show all posts

Friday, December 22, 2017

Is this thing on....? 2018 Blog is a go!


It has been 3 years since this blog has been updated and a lot has changed since my last post with the game of Infinity. Infinity is still the #1 game for me, the game has changed editions and now this blog is going to be rekindled in order to track my own progress this year for modeling, painting, running and attending Infinity ITS tournaments. It is a vehicle for accountability to myself and a centralized location to get my thoughts onto paper on whatever topic for that week/month.

Let's get onto the meat of the topic shall we?

2018 Goals:

  • Run 4, quarterly Infinity leagues locally
  • Run 4, quarterly Infinity ITS Tournaments
  • Paint 1 Theme Army per Quarter:
    • Q1: Gundum-Anx; Steel Phalanx
    • Q2: Synth-Rats; Morats
    • Q3: Heaven Lo-tek; Bakunin
    • Q4: Limesicle; ISS
  • Attend Rumble on Route 66
  • Attend Nova Open 2018

Each of these goals will have some sort of post related to the execution of the goal, for example the events will have After Action Reports written to relay my experiences running these events, the challenges encountered and how they were overcome.


Included below is some of the beginnings of the Theme Armies that I want to finish building and painting for 2018. Each army has a color scheme theme pulled from some inspiration, which will be explained more in depth in later posts.

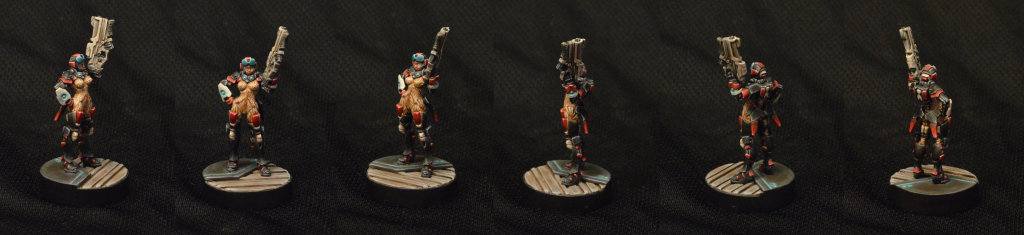
Synth-Rats Proof of Concept
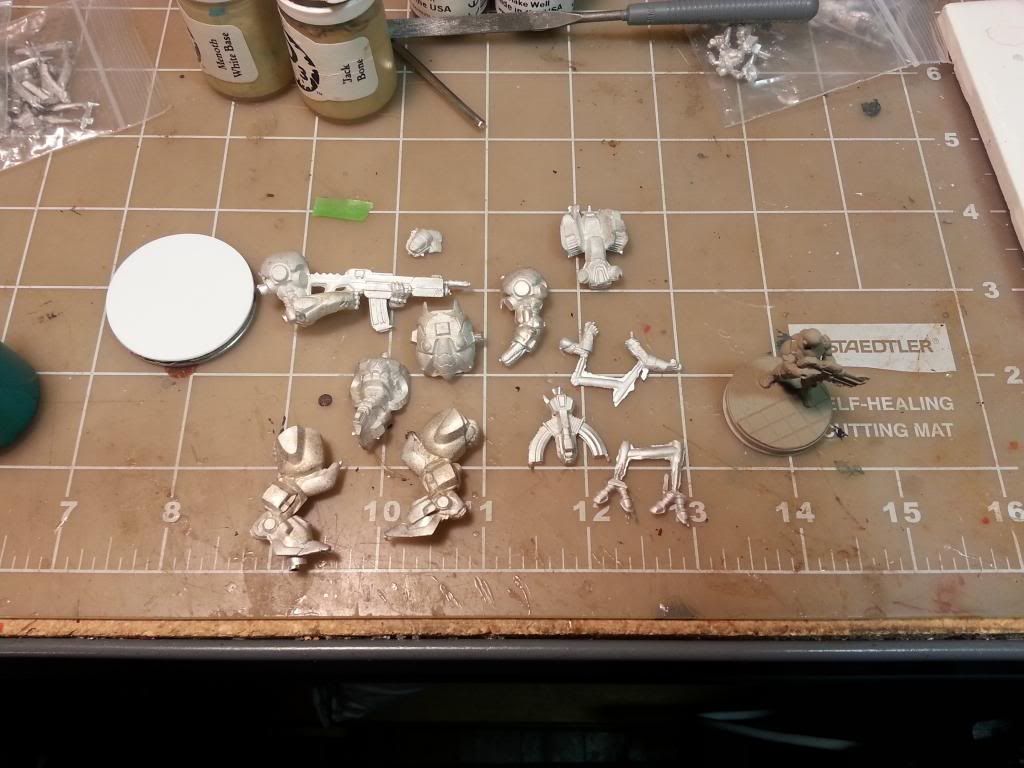
Synth-Rats Concept Testing

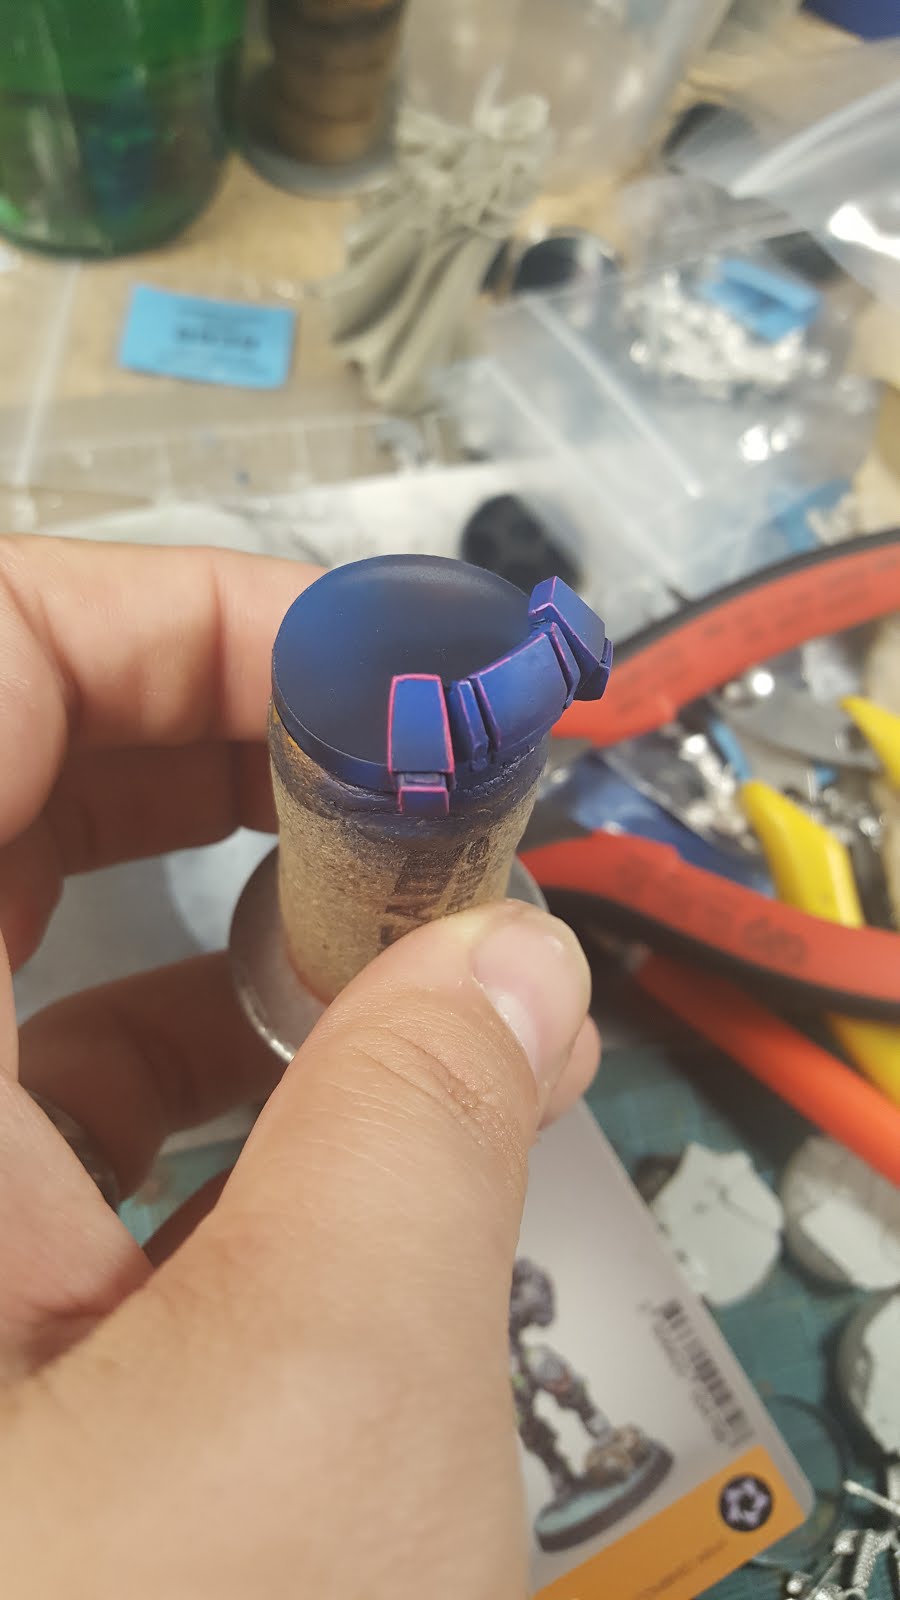
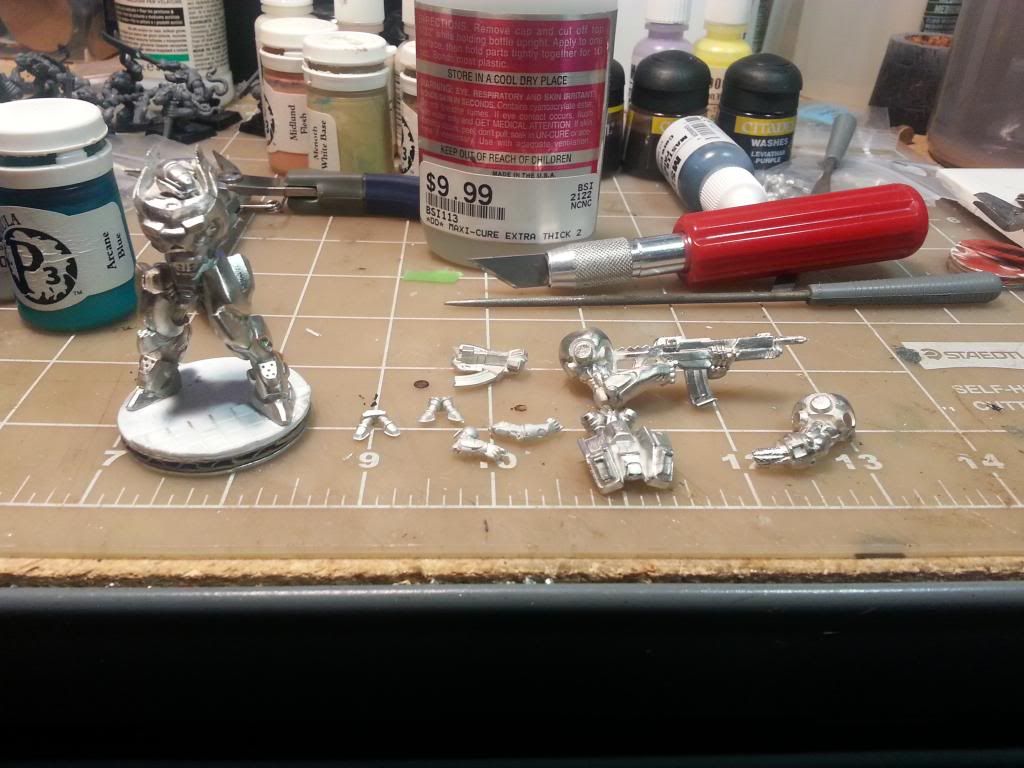
Gundum-anx Proof of Concept
The larger regional events will employ mission break-downs, army composition and tactics explanation, and just how much preparation put into traveling to these events and what I am doing to improve my finishes. 


Previous years I've done OK at these events but recently my time to physically get games in has been limited and mistakes have cropped up with deployment, speed of play, tactical decision making, etc. that have cost me enough that my potential finish position as suffered. 

I always have fun at these events even while getting my face smashed in, but I am always looking for new mini challenges in the game to try and swing it back in my favor. Those situations act as learning opportunities and continue to build up the game play experience for myself and my opponent.

That wraps up the first spark for the coming year, Happy Gaming!

Sunday, April 13, 2014

Riot Grrrl; Dedicated Photo Set-up Attempt

Riot Grrrl 2.0 Photos

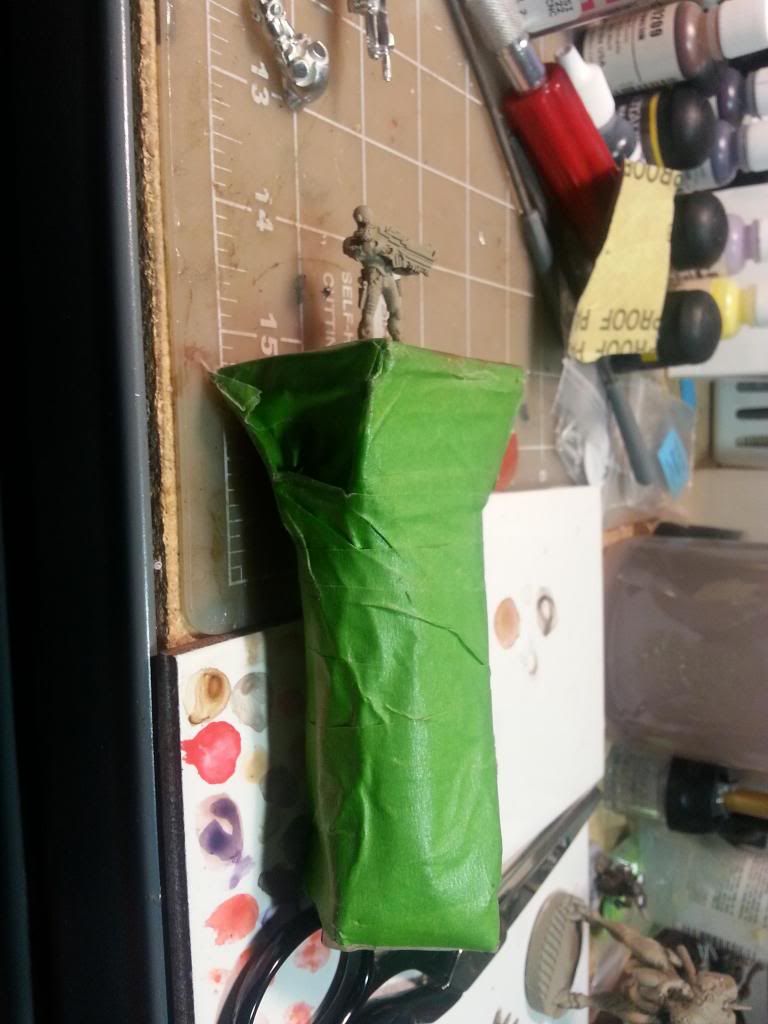
Here are the results of the first dedicated lighting set up I put together via blue tape/notebook paper, and a T-shirt!

Riot Grrrl 2.0 Photos


As an aside, how does the whole two or three people who even read this blog think of the single group collage or should I stick to more individual photos?

Nomads: Planning my Paint Schedule

Nomads: Painting on a schedule

I have an idea of what models I would like to get painted over the next year. I have a priority set on the models I think I will be using for NOVA 2014 for the ITS Tournament. There is also an additional set of models that will work better for YAMS compared to the ITS format that don't overlap my list building. That leaves the models that I have yet to build or get used infrequently in everyday gaming that will be the last in line to get painted.

There is another consideration that has sort of put a greater time sink on my modeling times. The construction of my weighted washer/palsticard bases for my Nomads gives a unique look, (also stops me from going crazy reproducing a similar base over and over again) but it takes a fair amount of time layering up the various bits of styrene, sanding the joints if any are present and then dressing the washer/cardboard/stryene sandwich layers with more thin sheet stryene for a finished product.

With that in mind I have to keep a weekly modeling/painting schedule if I hope to get all the models I want painted for NOVA. Thus far, keeping that personal schedule has worked out poorly. I have one model painted (the Crazy Koala that appeared earlier in my color scheme topic) another few primed, but the majority of the models sit on incomplete bases or need to take a trip to the Simple Green Bath so the painting quality/scheme matches up nicely with the rest of the force.
No, that's not all of them!

Now, the priority models that I know I will be using
as part of my lists:
1. Moran Maasi Hunter # 1
2-3. Crazy Koala Set # 1
4. Moran Massi Hunter # 2
5-6. Crazy Koala Set # 2
7. Interventor # 1
8. Interventor # 2
9. Prowler with Spitfire
10. Tomcat # 1
11. Tomcat # 2
12. Morlock # 1
13.Morlock # 2
14. Morlock # 3
15. Morlock # 4
16. Zero # 1
17. Zero # 2
18.Zero # 3
19. Zond Bot # 1
20. Zond Bot # 2
21. Reverend Custiodier
22. Zoe
23. Pi-Well

Let off from my list are all of the remotes that may or may not appear as part of the 3 different tournament lists for NOVA.

I still lack the new Iguana, but have purchased the Gecko box set and more Hellcats (up to three of them now; Boarding Shotgun, Hacker, and HMG models) There is another component working beyond what I need to paint; the local bi-monthly ITS event has a Painting Competition as part of the event (It keeps me actively painting if nothing else.)

Work has started on both the MK12 variant of the Gecko TAG and the Spitfire armed Prowler model for that competition. That sort of ties into my paint schedule. Sorta.


At this point, being 4.5 months from NOVA and only having a single model painted, I am happy to get any all things I can by that time.

Saturday, April 12, 2014

Q1 Progress Report

Quarter 1 Progress Report

I have gone dark (but tried to stay busy!) with this blog over the last two months. No excuses, just realizing keeping up a good level of content while balancing Life and Hobby time is rather more difficult than I would have thought.

With that in mind I have a few irons in the fire (feast or famine I guess) for posts to come in the next few weeks. There will be more on the get better tools for the job aspect, progress reports on how the modeling/painting of my Nomads is going and what I need to tackle in preparation for NOVA, Gnascon, and any other event I plan on attending.

Let look at what I have gotten done in the last two months (not remotely as much as I would have liked mind you.)

Tohaa:
I have that Sakiel I toiled over, stripped, and partially repainted. Tohaa have been placed on the back burner sadly. There is the positive note that the Gao Tarso w/ Viral Combi is built and Primed, a Chaksa Auxillar w/ Flamethrower built, and the lone Clipsos is assembled. My plan is to get the Sakiel finished at some point, followed by a representative of each model type to get the color scheme placement figured out. This will make painting the rest of the 12 or so models much quicker than the first.

Nomads:
There has been lots of work going on centered around these models between waiting for models to come out (Intruder HMG? You know the most common, awesome, MI available!) plus rebasing models to get my theme a little more consistent.

I have expanded my collection (just picked up the HellCat HMG/Hacker blister and the Gecko Box set.)

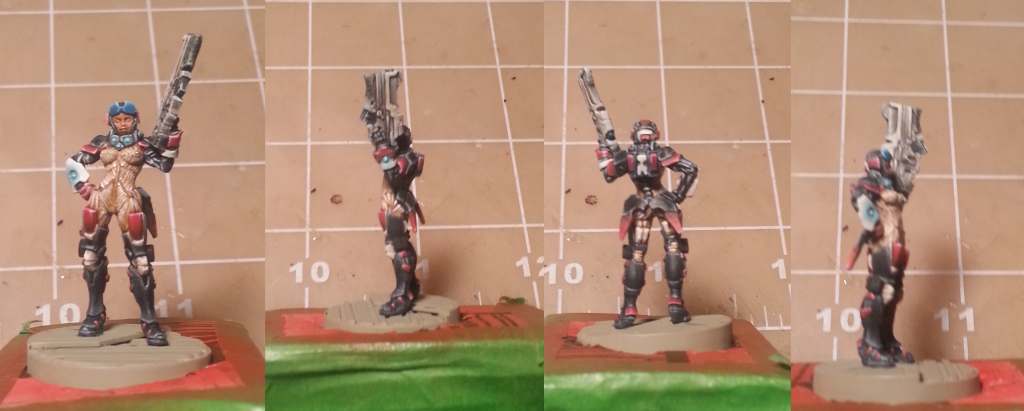
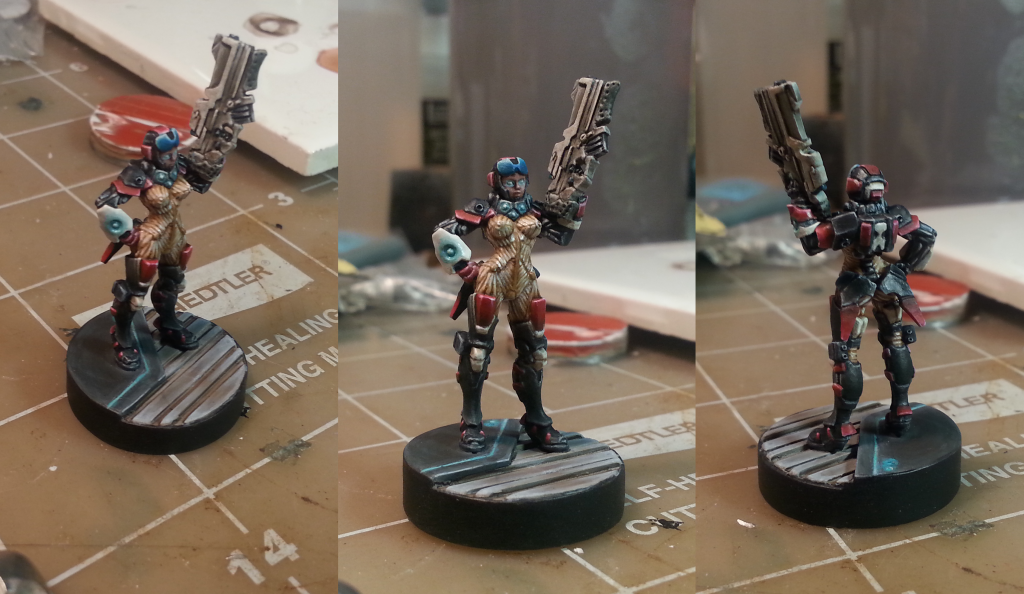
The painting front is not remotely where it should be, but I have painted another model to completion. I choose the Spitfire Riot Grrrl to paint for a local painting competition that is part of a Bi-Monthly ITS event. I didn't win (not sure what my placement was honestly) but I found that spark of REALLY wanting to paint to a high level on a regular basis returning after years of just having little interest in doing it.

Modeling Space:
Over the last two months, I have gone lighting crazy... after a trip to IKEA, I placed an additional two Swing Arm Lamps with 100w CFL Reveal Bulbs. Extra lighting goes a long way to keep your eyes from going cross from staring at the little details for hours on end. I have a lighting box project I want to complete very soon so my miniature photos don't just plain suck.

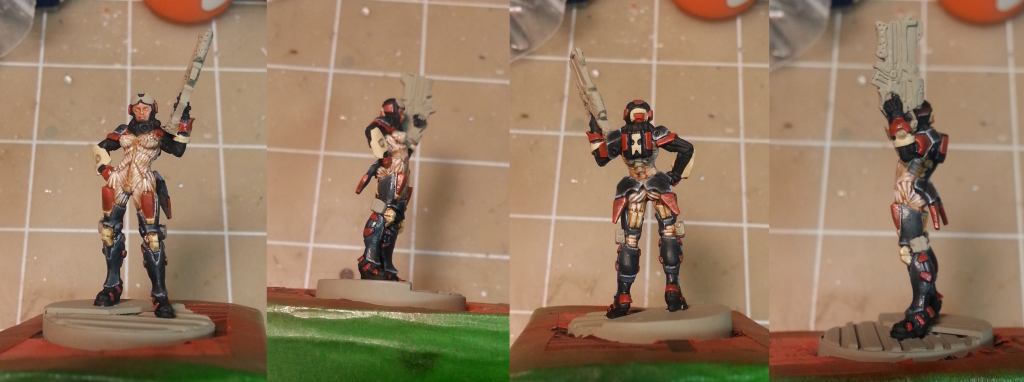
Nomads: Model #2 Riot Grrrl

I painted another Nomad Model

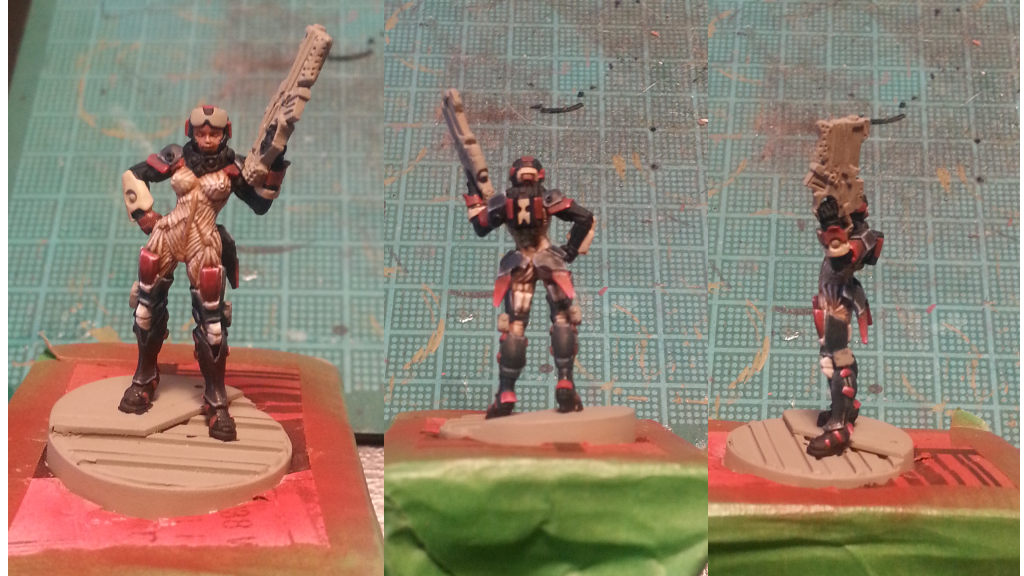
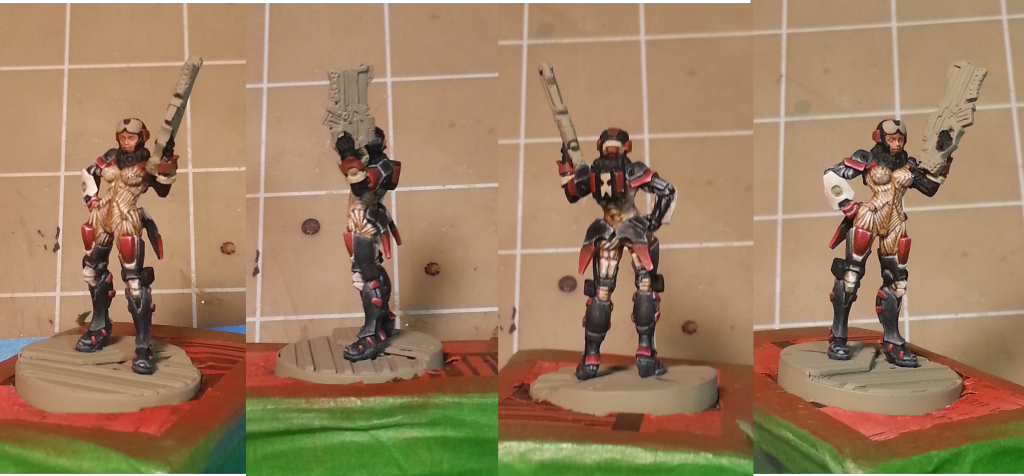
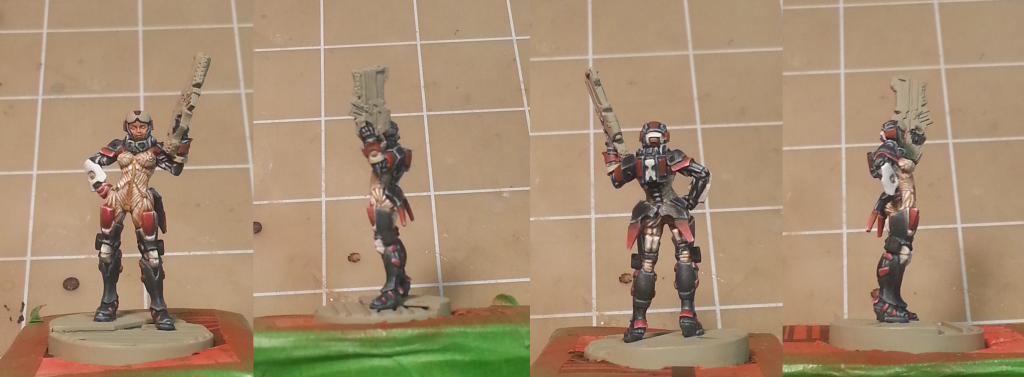
The Riot Grrrl is pretty interesting (although the anatomical armor gets some scorn from the SO); lots of small detail that is well defined from a sculpting perspective. Painting time was tracked via an audio book (John Ringo's "A Hymn Before Battle"; Pretty Awesome Military Science Fiction) That book clocks in right at 15 hours long, plus I spent 3 hours painting while watching the Route on Route 66 Infinity ITS Event Live Stream held in Amarillo, TX. All that combined I put in roughly 19 hours of painting from first brush stroke till final basing details over a 2 week period (for those with basic arithmetic skills, the last hour was spent painting the base.)

The progress photos were taken with my cellphone at the end of each painting session, so I apologize in advance for some of the blur/poor lighting conditions of those pictures. The final shots (once I get a light-box built, that is a project in of itself!) will be nice and clear.

I prime my models using Krylon Camouflage Khaki Paint. Why? I like neutral color bases, and for a long time I worked with a gray primer base until I tried it after seeing a fellow hobbyist using it. The warmer tones work better for my eyes and it takes color in some hues better than gray (red being a big one I noticed.) 

For glazes and washes I use a mix of Liquitex Glazing medium and VMC Matte Medium depending on the level of opacity for a given application (meaning I just make it up as I go and adjust via the addition of water as needed)

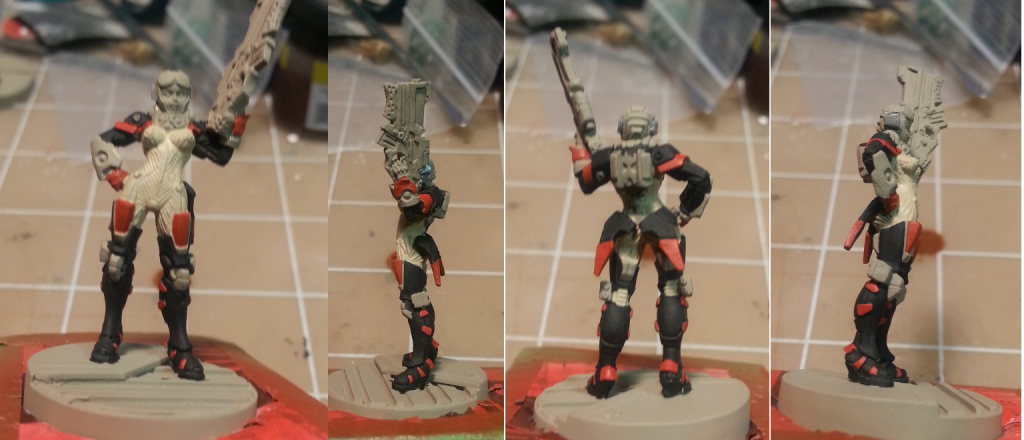
WIP 1


Session 1 found me laying out the majority of where I wanted colors to be located to get a feel for how colors needed to be balanced throughout the model. This is purely an aesthetic feel exercise, that I struggle with all the time, so laying out my plan a bit from the start keeps me focused on finishing the model and not floundering over color.. *cough* SAKIEL!!! *cough*

A quick run down of the paints I am using (Prepare for brand/system loyalty to go right out the window!)

Colors used
VMC Black
P3 Skorne Red
P3 Jack Bone

Another small detail you may notice, no antenna head gear. It's not because I did not like them, I misplaced them at some point after the initial assembly, so out came a small bit of Pro Create and good old fashioned boxy earmuffs got sculpted in their place.
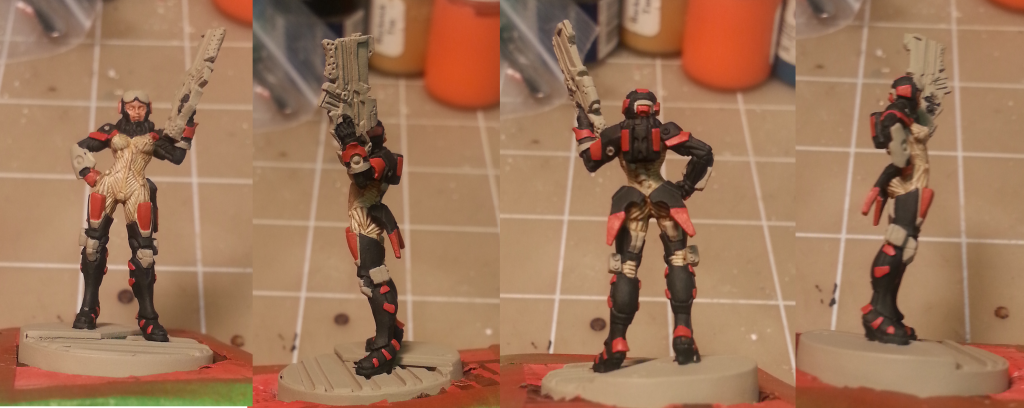
WIP 2


Session 2 I continued laying base colors for balance (mainly the darker armor areas and red fins) and started washing/glazing the under armor suit. I built the glazes from a mix of the Citadel washes Devlan Mud, Gryphonne Sepia, Army Painter Soft Wash, RMS Brown Ink, and a small amount of the base coat color: P3 Jack Bone. I adjust the glaze opacity as I go by adding paint for more extreme coverage per coat or more water to thin the layer, followed by a quick hit from the heat gun to dry it.

As an aside, a heat gun (its a scrap booking heat gun, so more like a dual setting hair dryer on high) makes painting in many thin layers move quickly when coupled with wash/glaze layers to blend highlights together. I wish I could paint via two brush or wet blend quickly, but the technique isn't clicking for me yet (one day!.) 
WIP 3


Session 3 is more of the same and rather boring. Focus almost completely on the underarmor; glaze, wash, paint detail, highlight and repeat.
WIP 4


Session 4 brought all kinds of progress, it was a marathon of about 3.5 hours of painting. I went to town on the armor, highlighting and glazing up a storm. I also did some shading to create shadow and mid-tones in preparation of tackling the red.

Colors used:
VMC Dark Gray
VMC Ivory
P3 Gnarls Green
P3 Skorne Red
Citadel Devlan Mud
WIP 5


Session 5 The reds started getting attention. I learned a great deal painting this model when it came to red and the red for my Nomads. It is evolving into a high-contrast, bright red with green hued shadow all the way up to a pink/white transition line highlight at the end. Its a very striking and warm color that's many thin layers of reds progressively pulled from the bottom to the top (where the most paint will be left behind as the brush is removed) with a few intermediate glazes every few layers to clean up the color changes.

Colors used:
P3 Menoth White Base (for the areas that will be close to white later)
P3 Gnarls Green
P3 Skorne Red
VMC Red
VMC Ivory
VMC Black
Citadel Devlan Mud
WIP 6


Session 6 Glaze... Glaze.. GLAZE! Same routine to get the armor and reds finished. Very limited palette was used throughout for this model (if you use a wet palette, 10 dozen colors can be made, kept, and reused from 2 or 3 base colors.) for ease of recreation later on the rest of my Nomad force.

Colors used:
P3 Menoth White Base (for the areas that will be close to white later)
P3 Gnarls Green
P3 Skorne Red
VMC Red
VMC Ivory
VMC Black
Citadel Devlan Mud
WIP 7


Session 7 is the same as 6.. grinding through those last details.

Colors used:
P3 Skorne Red
VMC Red
VMC Ivory
VMC Black
Citadel Devlan Mud
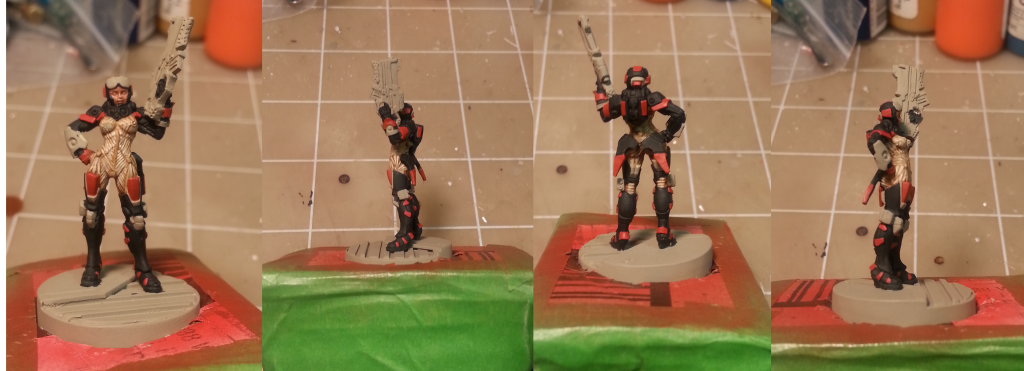
WIP 8


Session 8 is where the closing parts started to fall into place. Blues were glazed in for an attempt at basic OSL from the interfaces/gems on the gauntlets and neck armor. The lens was treated as if it were tinted blue, mainly to break up the model some and draw the viewers eye to the face (Not the face.. I am very bad at painting faces...) I attempted to paint the eyes as normal, black them out, fill in the white, define the pupil, Iris, etc.. After three attempts and messing up the Riot Grrrl got her some glowy eyes! The Spitfire main weapon was base coated in P3 Cryx Bane Highlight, Glazed with Delvan Mud, then highlighted up. The Contact points were base coated with P3 Cryx Bane Base, and highlighted accordingly.


Colors used:
P3 Skorne Red
VMC Red
VMC Ivory
VMC Black
P3 Arcane Blue
P3 Cyngar Blue Highlight
RMS Fair Skin
RMS Tanned Skin Highlight
P3 Cryx Bane Base
P3 Cryx Bane Highlight
Citadel Devlan Mud
Citadel Gryphonne Sepia
Citadel Ogryn Flesh

Finished 


Saturday, January 18, 2014

Nomads: It Only Takes one (RED)

Nomads was my first faction for Infinity. I started playing the faction not because I particularly liked them more than any other, it was the only faction in the group that had yet to be represented. It just so happened Nomads are one of the more well rounded factions available to play with.

The collection of models has grown over the last year and a half to include a large majority of those available to the faction, mainly lacking a few support models I rarely play with at this point. What I do not have is a painted force. I started a test moderator over a year ago and have since stripped and painted it four times looking for a scheme I enjoy painting and that I can consistently paint.


This relates back to kicking the rust off after more than 3 years of very little painting (plenty of gaming though!) I believe I painted this model somewhere around June of 2013, so not too long ago. I went with a fair amount of washing and little highlights that don't show up under these lighting conditions. I really need to set up a light box for this kind of thing...

I settled on a scheme that is still Nomad like in that it carries the Red, Black, and white colors, but switches where those colors appear on models depending on their status within the army and what I feel like painting.


Here is a good example of swapping the dominate colors around for a for unique look, but still maintaining the scheme and faction unity. This model was begun around the same time that I finished the Moderator test piece. It really shows in pretty much every part of what I thought was OK a few months ago. Now compare the reds on the single should pad I messed around with about two weeks ago to the reds I painted on the Moderator. Happy with the improvement so far.

Now lets get to something I painted about 4 weeks ago (and one of three models I managed to completely paint in 2013) ... a small KrazyKoala for one of my Moran Massi Hunters.


Now I was fairly happy with how this model turned out, including the base. The parts that really didn't work out so well, were the gems and OSL I failed miserably at for the eyes and "Mouth" area. I think I hit a block of not wanting to ruin otherwise acceptable paint job trying to kick rust off of that too. I am tweaking my airbrush in hopes of taking areas like that I can achieve a much better result with less effort.

These pictures are not kind, but in a good way for me to really see where I dropped the ball on technique and thought "That looks good enough." There are areas that stick out as poor (to the standard I want to achieve) i.e. the stomach plates and arms having a pink strip that has no blending and just shows up. The only way I am going to get better and really get a feel for technique is to paint as much as possible, to the best of my ability at all times until it just happens that way.

I made I few decisions for the Nomads paint scheme. I will use metallic paints, I don't have a very good NMM technique and I'd rather just paint a bunch of random stuff learning than try it on an army I would like to have fully painted by NOVA 2014. I not only want a painted force, but I want something that can compete for Best Painted. I feel I can have a good showing at an army level, just a personal goal for 2014.

Tohaa: Conspiracy of Color

When I left off I was struggling with what was my next step. As you can see, I sort of just started shotgunning colors onto the model. The Emerald weapons just created too much chaos and while I liked the grenade colors themselves, again they just did not add anything to the scheme.


I took a few days of thinking with the occasional change being made as I went. I ended up using RMS Imperial Purple for the cloth color and did a gem style nightshade purple fade all the way to the brightest Amethyst Purple for the highlights. I also made the decision to stick with a more classic black high contrast weapon. In doing so I also tried a bright yellow weapon which ultimately (I didn't grab a picture of that mess!) got paint back over with VMC Black. 

The mask got a different treatment, which I while I was happy with the result, felt it was not bright enough for the rest of the scheme (as pictured below.) 

During all of this I realized (and it was pointed out a few times on forums!) a mold line I missed running half the length of the holster side of the body of the Sakiel, so it was going to head back to the a Simple Green dip for me to start over. My Cat thought it would be a good idea to encourage me to do so today by playing a quick game of swat my stuff off the table.


The damage wasn't bad after coming the 40" off my bench to wood floors as I would have thought, but it was getting a repaint to begin with, so its not sitting in a bath of simple green over night.

With that being said, I am happy with what I came out with for my scheme, its more akin to an organic Dark Elf style than I realized. They do stick out in a crowd (and on the table.)

Items I will concentrate more on when I start the Kaemel for the first "completed" model for this army are:

1) Increase the contrast of the yellow, I like the mid-tone and highlight I got to, but it really needs more depth added to it initially with some quick washes with a brownish paint.
2) Increase the brightness and contrast of the mask; I am not sure how just yet.
3) Watch those damn dainty mold lines!
4) Don't give up!

With the release of the ITS 2014 scenarios and formats I have made the choice to continue with my Nomads for the most part as my main army and paint my way through this year. Overall that will mean a Nomad model or two every week, with a Tohaa thrown in so I am painting red until my eyes cross.

Next up is a quick run down of the Nomads models that I have set up to be painted for this year, the scheme I settled on, the first test model and the 2nd.

Saturday, January 4, 2014

Tohaa: A Color Scheme

This past August, fellow gamer Todd won a Tohaa starter box at NOVA 2013. He graciously gifted (bartered!) it to me, as I had expressed interest in playing the faction (and it cut down on how much the split bill was in the end!) a few times.

While at NOVA I took advantage of TheWarStore.com being set up with a booth stocked with Infinity goodies and purchased a Chaksa boxset, Makauls Boxset, and a Gao Rael w/ Sniper rifle to get my force started.

Those models have since set in a box, waiting for a day when I felt likg modeling and painting them. That day is now (or about 14 days ago at this point!) and I have started with a test paint scheme on the Sakiel (which when I started with it, I had no real intention of using Sakiels in my lists, but then ITS 2014 came out and BAM! I need as much Viral as I can get, but that is for another post.)

Starting out, I struggled with the color scheme I wanted to use for my army. I am always the contrary type when it comes to official schemes, always waiting to do something different or at least flip major/minor colors around some. The Tohaa presented an interesting avenue to approach the scheme from, they are aliens and they have living things that provide armor for them (for some at least.) I searched  for inspiration among other Tohaa players armies, but never saw anything that sparked my interest. I broadened my search to just include a color that I wanted to work with, Purple. Again nothing really seemed to grab my attention as most of the schemes were very monochromatic. Finally I turned to nature and a silly debate with my fiance about if there were red and purple beetles. A quick Google search turned up such a beast and the inspiration for my Tohaa Army!

Meet Chrysochroa-Buqueti or the Banded Jewel Beetle.


This picture (and others like it) inspired what I am working on now. Executing against what I had envisioned in my minds eye on the other hand as been a very slow process. I am working with some hues I normally avoid like the plague (Yellow and Purple) so I first had to add more paints to my collection (never a bad thing if you ask me.) I purchased two RMS triads; the Royal Purples and the Dark Elf Flesh. The Royal purples will be used on the Armor and Symbiote while the Dark Elf flesh will be used on the Chaksa models skin to tie the army together but give the Chaksa a foreign look compared to the rest of the army.


I approached painting the Sakiel from the inside out, meaning I started with the inner most detail of the model. In this case it was the Symbiote, which I chose the Amethyst Purple as the initial mid-tone color. I washed all the areas with a watered down (with a mix of water and matte medium) coat of purple.

I then did a glaze of Imperial Purple and Liquitex glaze medium to darken the recesses more than the higher areas. I didn't get a picture of this step. I did layers of this, and then switched to the major armor flats. I picked out nightshade purple as the base to eventually create a high contrast dark to light transition, but here is the base coat step.


Also pictured are the kerf cut armor plates and what I view as lower support armor below the outer plates and on the feet. These were painted using a thinned layer of VMC German Gray.

After this I hit a hold point of sorts as I pondered what I wanted to paint the straps over the cloth and symbiote armor. I wanted to paint some sort of soft yellow, but being that I don't use those colors much, I had a small and very bright selection to choose from. I ended up taking a trip to local gaming/comic book store (Parker Banner Kent and Wayne) to look for paints.


This what I settled on, P3 Menoth White Base (a paint that I already had) and RMS Lemon Yellow. I applied a thinned layer (thinned with matte medium) of Menoth White Base followed by a thinned layer of RMS Lemon Yellow. I also followed through with the  Beetle scheme and base-coated the mask of the Sakiel with VMC Flat Red and washed it with Citadel Leviathan Purple Wash (Discontinued..sigh.)

All the paints I use to paint my Reds

That is far as my progress has gotten me to date. If you notice the leg on the left has the straps painted yellow and the cloth parts black. I am not sold on this part of the scheme yet. The weapons and accessories are still in the white, trying to decide what colors would go well (thinking a bright emerald type color for the weapons, but that also means I need to dig around for a green/turquoise paint or take another trip to the PBKW.

Continued in Part 2.