Showing posts with label Modeling. Show all posts

Friday, December 22, 2017

Is this thing on....? 2018 Blog is a go!


It has been 3 years since this blog has been updated and a lot has changed since my last post with the game of Infinity. Infinity is still the #1 game for me, the game has changed editions and now this blog is going to be rekindled in order to track my own progress this year for modeling, painting, running and attending Infinity ITS tournaments. It is a vehicle for accountability to myself and a centralized location to get my thoughts onto paper on whatever topic for that week/month.

Let's get onto the meat of the topic shall we?

2018 Goals:

  • Run 4, quarterly Infinity leagues locally
  • Run 4, quarterly Infinity ITS Tournaments
  • Paint 1 Theme Army per Quarter:
    • Q1: Gundum-Anx; Steel Phalanx
    • Q2: Synth-Rats; Morats
    • Q3: Heaven Lo-tek; Bakunin
    • Q4: Limesicle; ISS
  • Attend Rumble on Route 66
  • Attend Nova Open 2018

Each of these goals will have some sort of post related to the execution of the goal, for example the events will have After Action Reports written to relay my experiences running these events, the challenges encountered and how they were overcome.


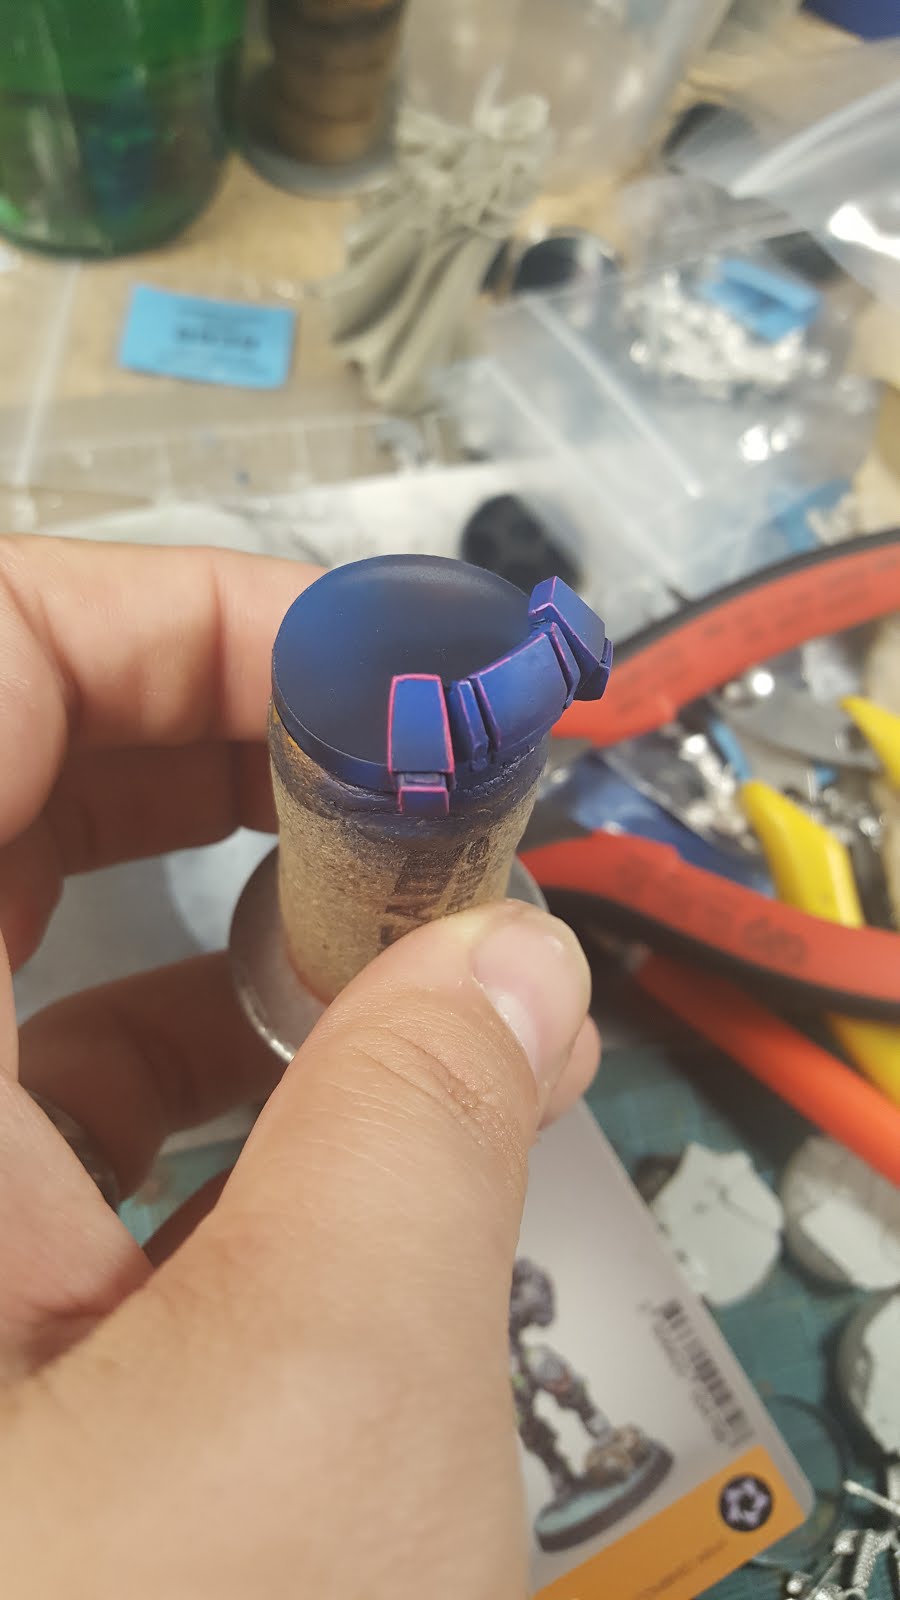
Included below is some of the beginnings of the Theme Armies that I want to finish building and painting for 2018. Each army has a color scheme theme pulled from some inspiration, which will be explained more in depth in later posts.

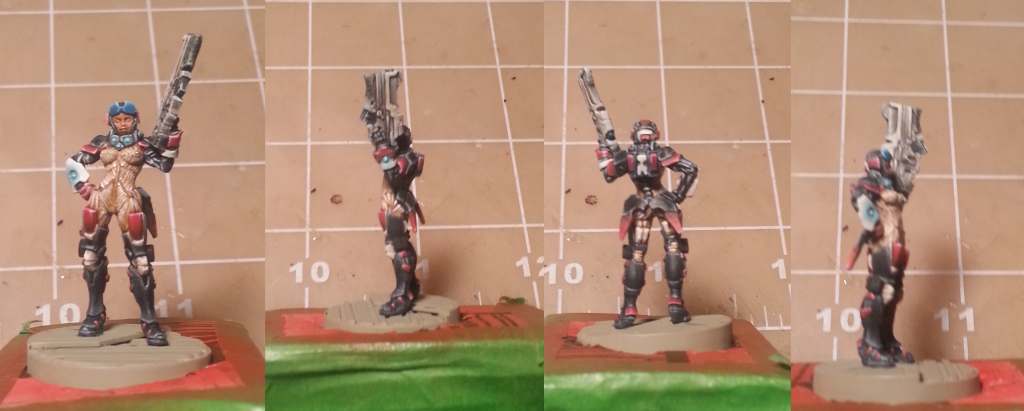
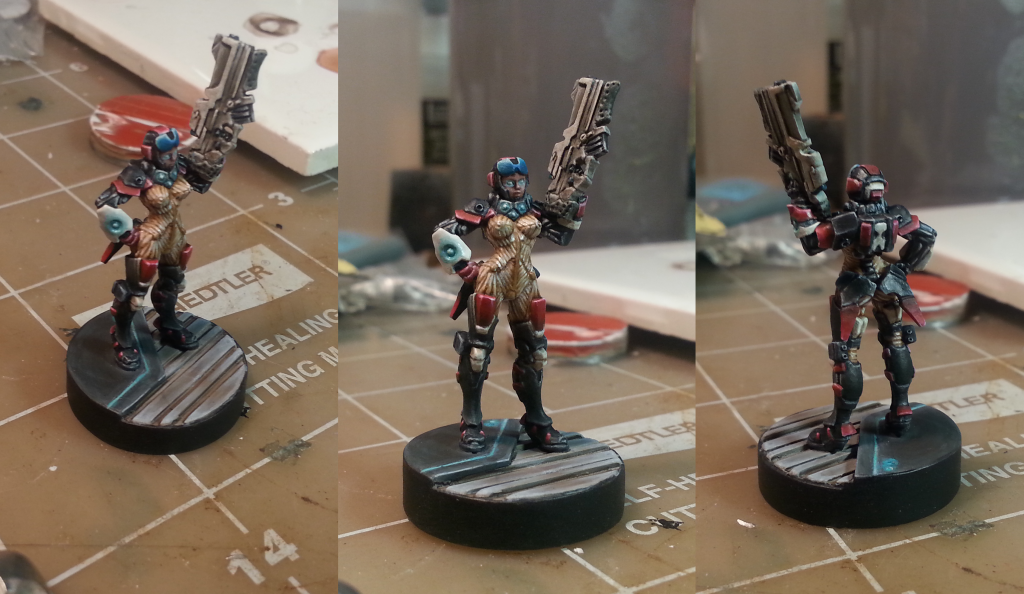
Synth-Rats Proof of Concept
Synth-Rats Concept Testing

Gundum-anx Proof of Concept
The larger regional events will employ mission break-downs, army composition and tactics explanation, and just how much preparation put into traveling to these events and what I am doing to improve my finishes. 


Previous years I've done OK at these events but recently my time to physically get games in has been limited and mistakes have cropped up with deployment, speed of play, tactical decision making, etc. that have cost me enough that my potential finish position as suffered. 

I always have fun at these events even while getting my face smashed in, but I am always looking for new mini challenges in the game to try and swing it back in my favor. Those situations act as learning opportunities and continue to build up the game play experience for myself and my opponent.

That wraps up the first spark for the coming year, Happy Gaming!

Saturday, June 21, 2014

BASES: A new hope

After a long marathon of modeling over (last) weekend, some bases got built, a few more models got primed, and I ran out of materials to finish bases I was working on.

To be specific I have enough materials to complete 16 bases.
 
Above is the beginnings of the Project with the washers, cardboard spacers, sheet polystyrene 1" circles and all the pieces to make the slats.


Here is a work in progress image of placing the slats in alternating sizes. I use brush on super glue to control the amount if put on the slats. The brush on is pretty thin compared to the (intentionally) thicker bottle I buy for modeling purposes.


Another set of the top covers completed. That brings me to where I am at currently, which is running a .010" thick piece of polystyrene around the edge of each piece and finish sanding the base to be uniform and without any major gaps.

Wednesday, June 11, 2014

BASE-POCALYPSE

Its has been a little while since I picked up  the key board to explain what's going on in my Infinity world.

What has happened? Not too much! Other than gaming some and attending an ITS event its been quiet on the modeling/Painting front.

I did get accepted as a Warcor, eh? I've got to do something about it now.

Back to the title of this post.. I have been working steadily over the last two years creating various bases for my Nomads going all over the place. In that time I have made dozens of bases and lately just got the bug to standardize as much as possible... so this happened last night..

I basically removed 20+ models from their old variant bases, dropped the ones I had used for test models in the simple green salsa jar and started to build all new clean bases.

There are going to be two types of bases I produce. The concept will be the same, but each will be unique in its construction. The first type will be really simple, a piece of deck plate and texture to look like concrete/weird dirt as seen on the Crazy Koala I posted in an earlier article. The second will be a slatted bottom with the same unifying deck plate top piece as seen below.

That does mean I have a lot more incentive to get these done in a timely manner so that the models can get back on the table top.

I am going to concentrate on the Bakunin side first including putting together all my Reverend Moria Models and the Chimera too. 

______________________________________________

As an aside, I am trying out the blogger App, so if this post turns out to be a formatting mess with tiny pictures, be sure to let me know!

Saturday, April 12, 2014

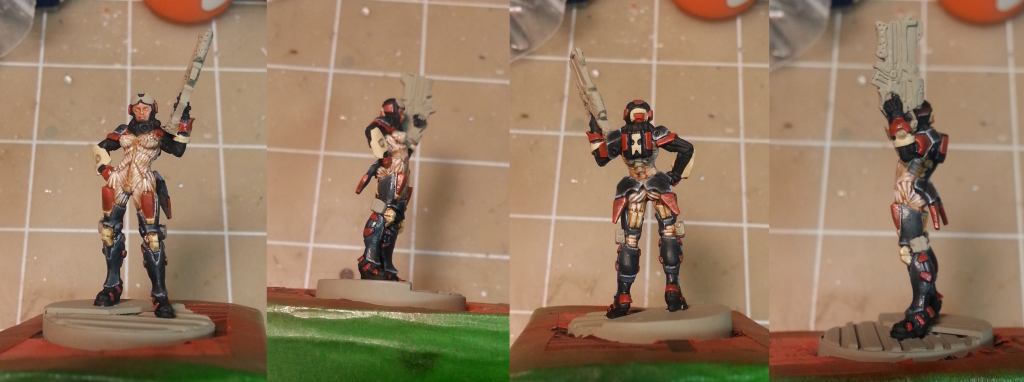
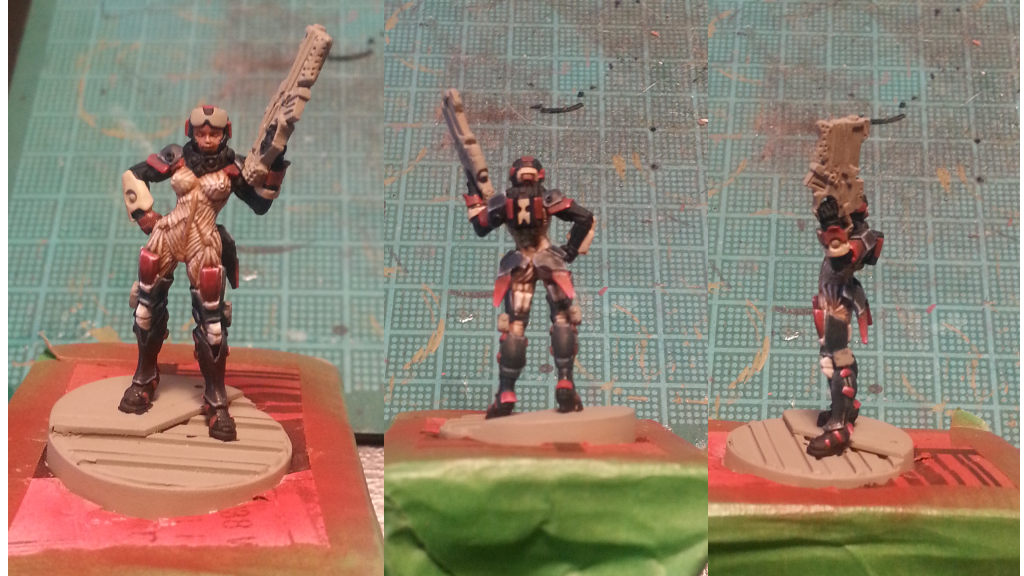
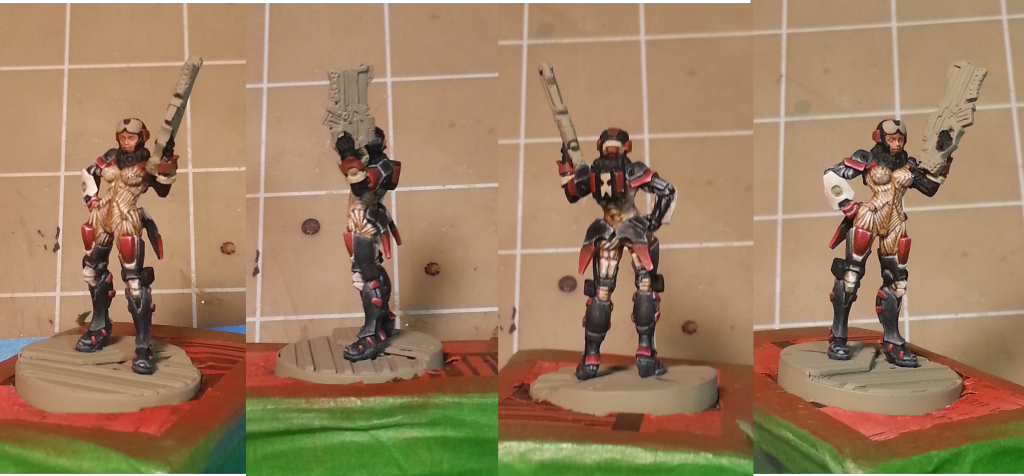
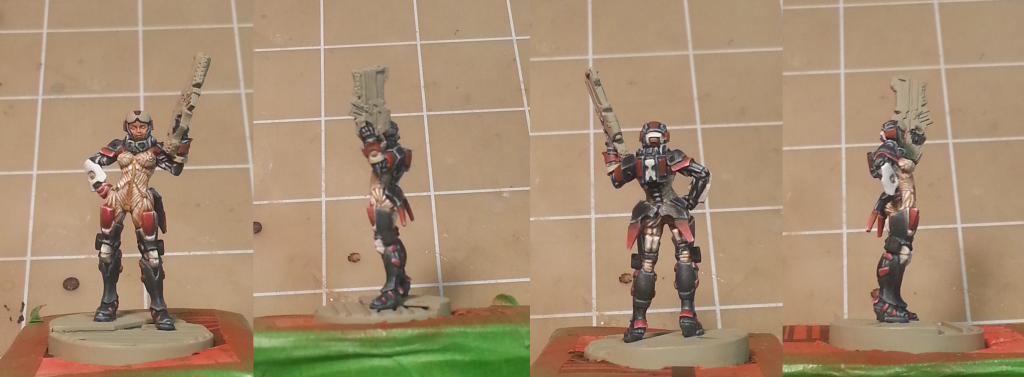
Nomads: Model #2 Riot Grrrl

I painted another Nomad Model

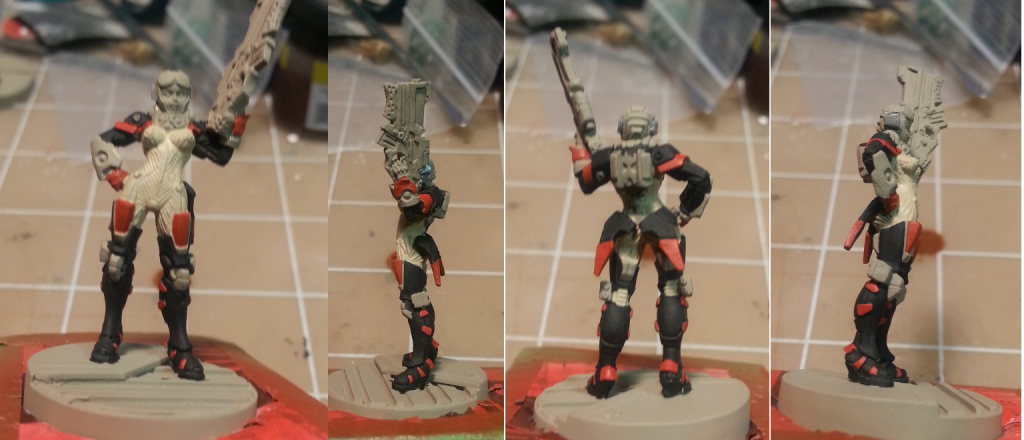
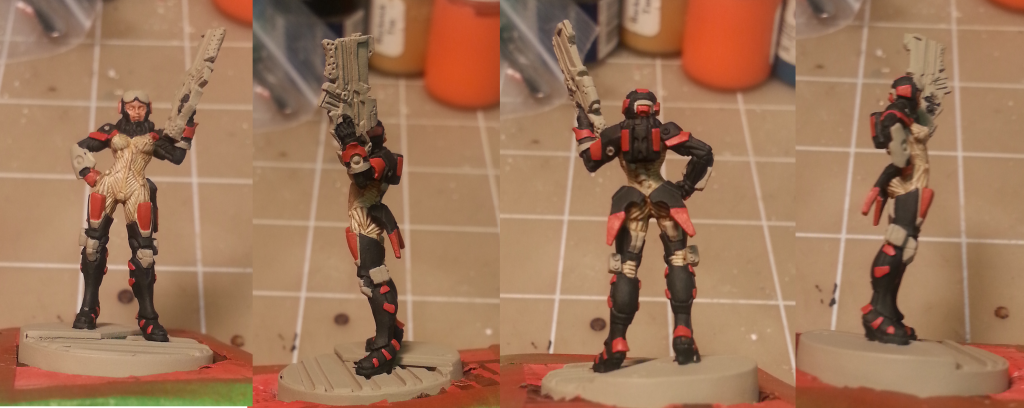
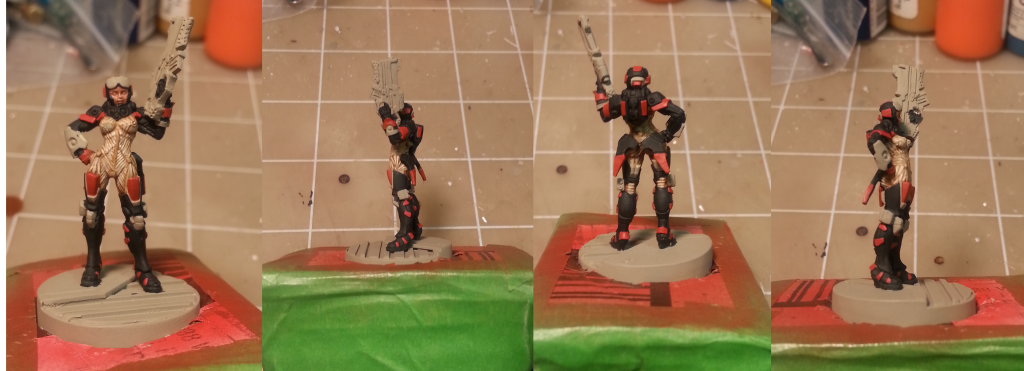
The Riot Grrrl is pretty interesting (although the anatomical armor gets some scorn from the SO); lots of small detail that is well defined from a sculpting perspective. Painting time was tracked via an audio book (John Ringo's "A Hymn Before Battle"; Pretty Awesome Military Science Fiction) That book clocks in right at 15 hours long, plus I spent 3 hours painting while watching the Route on Route 66 Infinity ITS Event Live Stream held in Amarillo, TX. All that combined I put in roughly 19 hours of painting from first brush stroke till final basing details over a 2 week period (for those with basic arithmetic skills, the last hour was spent painting the base.)

The progress photos were taken with my cellphone at the end of each painting session, so I apologize in advance for some of the blur/poor lighting conditions of those pictures. The final shots (once I get a light-box built, that is a project in of itself!) will be nice and clear.

I prime my models using Krylon Camouflage Khaki Paint. Why? I like neutral color bases, and for a long time I worked with a gray primer base until I tried it after seeing a fellow hobbyist using it. The warmer tones work better for my eyes and it takes color in some hues better than gray (red being a big one I noticed.) 

For glazes and washes I use a mix of Liquitex Glazing medium and VMC Matte Medium depending on the level of opacity for a given application (meaning I just make it up as I go and adjust via the addition of water as needed)

WIP 1


Session 1 found me laying out the majority of where I wanted colors to be located to get a feel for how colors needed to be balanced throughout the model. This is purely an aesthetic feel exercise, that I struggle with all the time, so laying out my plan a bit from the start keeps me focused on finishing the model and not floundering over color.. *cough* SAKIEL!!! *cough*

A quick run down of the paints I am using (Prepare for brand/system loyalty to go right out the window!)

Colors used
VMC Black
P3 Skorne Red
P3 Jack Bone

Another small detail you may notice, no antenna head gear. It's not because I did not like them, I misplaced them at some point after the initial assembly, so out came a small bit of Pro Create and good old fashioned boxy earmuffs got sculpted in their place.
WIP 2


Session 2 I continued laying base colors for balance (mainly the darker armor areas and red fins) and started washing/glazing the under armor suit. I built the glazes from a mix of the Citadel washes Devlan Mud, Gryphonne Sepia, Army Painter Soft Wash, RMS Brown Ink, and a small amount of the base coat color: P3 Jack Bone. I adjust the glaze opacity as I go by adding paint for more extreme coverage per coat or more water to thin the layer, followed by a quick hit from the heat gun to dry it.

As an aside, a heat gun (its a scrap booking heat gun, so more like a dual setting hair dryer on high) makes painting in many thin layers move quickly when coupled with wash/glaze layers to blend highlights together. I wish I could paint via two brush or wet blend quickly, but the technique isn't clicking for me yet (one day!.) 
WIP 3


Session 3 is more of the same and rather boring. Focus almost completely on the underarmor; glaze, wash, paint detail, highlight and repeat.
WIP 4


Session 4 brought all kinds of progress, it was a marathon of about 3.5 hours of painting. I went to town on the armor, highlighting and glazing up a storm. I also did some shading to create shadow and mid-tones in preparation of tackling the red.

Colors used:
VMC Dark Gray
VMC Ivory
P3 Gnarls Green
P3 Skorne Red
Citadel Devlan Mud
WIP 5


Session 5 The reds started getting attention. I learned a great deal painting this model when it came to red and the red for my Nomads. It is evolving into a high-contrast, bright red with green hued shadow all the way up to a pink/white transition line highlight at the end. Its a very striking and warm color that's many thin layers of reds progressively pulled from the bottom to the top (where the most paint will be left behind as the brush is removed) with a few intermediate glazes every few layers to clean up the color changes.

Colors used:
P3 Menoth White Base (for the areas that will be close to white later)
P3 Gnarls Green
P3 Skorne Red
VMC Red
VMC Ivory
VMC Black
Citadel Devlan Mud
WIP 6


Session 6 Glaze... Glaze.. GLAZE! Same routine to get the armor and reds finished. Very limited palette was used throughout for this model (if you use a wet palette, 10 dozen colors can be made, kept, and reused from 2 or 3 base colors.) for ease of recreation later on the rest of my Nomad force.

Colors used:
P3 Menoth White Base (for the areas that will be close to white later)
P3 Gnarls Green
P3 Skorne Red
VMC Red
VMC Ivory
VMC Black
Citadel Devlan Mud
WIP 7


Session 7 is the same as 6.. grinding through those last details.

Colors used:
P3 Skorne Red
VMC Red
VMC Ivory
VMC Black
Citadel Devlan Mud
WIP 8


Session 8 is where the closing parts started to fall into place. Blues were glazed in for an attempt at basic OSL from the interfaces/gems on the gauntlets and neck armor. The lens was treated as if it were tinted blue, mainly to break up the model some and draw the viewers eye to the face (Not the face.. I am very bad at painting faces...) I attempted to paint the eyes as normal, black them out, fill in the white, define the pupil, Iris, etc.. After three attempts and messing up the Riot Grrrl got her some glowy eyes! The Spitfire main weapon was base coated in P3 Cryx Bane Highlight, Glazed with Delvan Mud, then highlighted up. The Contact points were base coated with P3 Cryx Bane Base, and highlighted accordingly.


Colors used:
P3 Skorne Red
VMC Red
VMC Ivory
VMC Black
P3 Arcane Blue
P3 Cyngar Blue Highlight
RMS Fair Skin
RMS Tanned Skin Highlight
P3 Cryx Bane Base
P3 Cryx Bane Highlight
Citadel Devlan Mud
Citadel Gryphonne Sepia
Citadel Ogryn Flesh

Finished 


Sunday, December 22, 2013

Surroundings

Another goal I have been wanting to tackle for the last few months was my painting/modeling area. I have a small, but dedicated space for which to work on all my nerdish hobbies to my hearts content. That being said, I don't always use my space very well and in particular, I didn't have it lit very well.


I have always had some sort of desk to do hobby work on over the last 13 years. The best point being when I had a 4' double fluorescent light bar with daylight bulbs above my head for painting. I never had any light issues, but my current space doesn't allow me to hang that light bar, so it is packed away in the attic.

To help remedy that I went on a thrift shop hunt for a new (and cheap!) lamp. The first Goodwill stop had a $5 desk lamp that was only missing the clamp (that I can't use), that kind of luck never happens! Next stop was Lowes to grab a Reveal CFL to throw into it. The light cost more than the lamp, but I got a 26w (100w equivalent) White (Day) light. I got the CFL because it runs substantially cooler than the incandescent bulbs that I have used in the past, but the light works really well.

The Lamp was screwed down to the work surface allowing it to be swiveled to where it is needed, but still be above my head during use.

LIGHT!

I have my second light that is now pulling back lighting duty (that is a standard cold Fluorescent light that is still going strong after almost 10 years!)

The next thing that I had stopped using for a few years (mainly due to lack of desire to paint) was my wet pallet. I've had the case that I use that was I think originally from a cheap screw micro-screwdriver set that was purchased years ago at a Big-Box-Store.

Empty

It is about 3.5" x 8" on the inside, folding with a locking top. To that I took some closed cell foam from a Pelican Case I had laying around (denser than the foam that comes in the Infinity blister or box sets) and cut it to size.

Foamed

I placed a small amount of water in the bottom and allowed the foam to soak it up. It takes a little while for it to absorb water in compared to a lower density foam, but it also retains water for a long time afterwards. Next, a piece of parchment paper was cut to size to lay on top of the dampened foam. Speaking of the wetness level, its more about experience as to how much water needs to be in the foam for it to retain the moisture content of the paint, but not be so high that it thins the paint down way to much after it sits over night.

Parched

I pull the parchment paper over a table edge, applying light pressure at the corner to remove the roll that occurs straight from the box. This (which was done at the picture above) makes the paper lay flat so the paint stays put.

Finished!

As you can tell, the holidays are not being kind to my ability to work on modeling. Got behind already! More updates about the Skavens (There was a Warhammer Fantasy player at one of my local GWs back in the day that added a "S" to everything so the name as stuck ever since) Warband progress and what I am doing with my Tohaa and Nomads.